


So, what is Vagrant?
Well, Vagrant is an open-source Infrastructure as Code tool developed by HashiCorp (the same creator of Terraform), mainly used for automating the creation and management of virtual machines in local development environments. This means if you use VirtualBox, VMWare, Docker and Hyper-V, you can use Vagrant to automate your machines within these providers.
One of the really useful things about Vagrant is that you can integrate other IaC tools such as Chef and Puppet within it. You can also run Vagrant together with cloud providers like AWS, though I feel there are better suited IaC tools for cloud based providers.
There are many real world applications to using Vagrant, some include:
Creating a Homelab for personal development and testing (could be used to practice Sysadmin work, networking, replicate and troubleshoot, Server Admin, cybersecurity, etc.).
Running local tests on new software before releasing or using (helps spot bugs and helps test out potential software and apps before spending money for company wide licenses).
Prototyping VMs locally before rolling them our elsewhere for other developers.
Testing out an OS not yet used within your team, or a new OS update before rolling out.
Sharing your Vagrantfile with other developers to ensure they can reproduce the same results and work with the same development environment.
Objectives of this project:
Install Vagrant and ensure its working using GitBash CLI.
To automate the creation of my Homelab as well as add on to the current machines that were manually created on virtual box.
Understand how to create VMs with Vagrant
Understand how to implement network connectivity for the VMs with Vagrant
The Process:
Setting up the project directory and Vagrantfile:
Ensure you have both Oracle VirtualBox and HashiCorp Vagrant installed on your PC. They will have options and instructions on how to install them, regardless of whether you are on MacOS, Windows or Linux. I will be using GitBash for my CLI as it's what I'm used to since a lot of my work is linked with Git. If you wish to mimic my set up then head over to https://gitforwindows.org/ to install the Git for Windows package where GitBash comes included in the install.

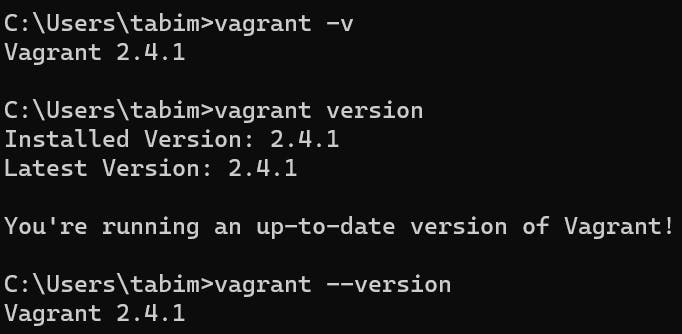
To check if Vagrant is working, open your command prompt and enter the command "vagrant -v" or "vagrant version" (the -v and version are the same thing). This should provide an output displaying the version that's been installed (the current latest version as of writing this is vagrant 2.4.1):
Once we've confirmed all programs are working, create a directory for your Vagrant project. This is where the Vagrantfile shall reside. After this go into the directory and create and open a file called "Vagrantfile" (exactly as written with the capital V). This can be done manually and accessed via VSCode or through the CLI:

Now we will begin configuring the Vagrantfile with our VMs.
Creating multiple VMs in Vagrantfile:
In the code below we have set out the start and finish of the Vagrantfile. The first line we have specified what version of the Vagrant we want to use for this configuration file, in this case its "2".
At the end of that first line we have made a reference that will be used for configuration for any boxes we want configured from this file. We will use this reference later on in the Vagrantfile.
# A Vagrant File starts with a configuration block.
# NOTE: Start and end of the Vagrantfile

Vagrant.configure("2") do |config|
#.....
end
Below, we have defined an image block where we will specify what specifications of the VM we want as well as reference at the end. Using the line config.vm.define and then typing the name you want Vagrant to recognise will change the name of the VM outside the machine as well. I have specified (using .vm.box) that the box image I want to use is CentOS version 7. You can find further box images on the Vagrant Cloud Website.
The next line (.vm.box_check_update) checks if the image we are using need to be updated upon creation. If you want a box to stay a specific version with no updates then you can label this "false" to keep the environment to your preference but here I want to enable it so the image is up-to-date so I have stated the value for this to be "true".
The last line in the box below (.vm.hostname), sets the hostname of the machine we want to create, this can be anything but i have decided to name this machine "LON-V001".
config.vm.define "LON-V001" do |lcv1|
      lcv1.vm.box = "centos/7"
      lcv1.vm.box_check_update = true
      lcv1.vm.hostname = "LON-V001"
#....
end
The next two lines are important as they focus on the network connectivity of the machine. This part is important as it can determine how the Box communicates with external and internal networks and devices.
There are various types of network connection one can use with a VM:, but with Vagrant we have 3 specific options to pick from:
Bridged connection - Public Network: Public networking attaches VMs to the same subnet with the host PC.
forwarded port - Port-forwarding: Port-forwarding creates tunnels from VMs to the outside world. We can see this is the first of the 2 lines below. If we wanted to configure port forwarding (config.vm.network) here, we could say port 8080 for the host, and it will be forwarded to port 80 on the guest VM.
Isolated Host-only Network - Private Network: Private networking hides VMs from the outside of the Vagrant host. Below in the second line of code, we would specify the network connectivity type first, the IP address we want to manually assign and then we have specified that the VirtualBox provider join a specific internal network called "labnetwork1" and will apply the same for the other boxes being configured in this file.
lcv1.vm.network "forwarded_port", guest:XX, host:XXXX
lcv1.vm.network "private_network", ip: "xxx.xxx.x.xx", virtualbox__intnet: "labnetwork1"
Using "config.vm.provider" Configures provider-specific configuration, which is used to modify settings which are specific to a certain provider. If you would like to configure the CPU and memory settings on the VM, then you can do that within the provider VirtualBox Block like this.
Here I have done the following:
- Configured the memory (RAM) to be 2GB.
- Configured the machine instance name (not to be confused with the hostname implemented inside the machine rather than with VirtualBox, set the instance name stops it from being set as "default", which happened to me when initially testing this out).
- Enabled the GUI for the centos instance to be true so use of the GUI is possible.
lcv1.vm.provider "virtualbox" do |vb|
          vb.memory = "2048"
          vb.gui = true
          vb.name = "LON-V001"
      end
Provisioners in Vagrant enable you to setup your VM with everything it needs to run your software. Every provisioner is configured within your Vagrantfile by using the "config.vm.provision" method call. An example to note would be in the code block below, the Vagrantfile below enables shell provisioning.
In this last section of the image block we have configured a simple shell script to run an update on all available packages, installation of net-tools package (a collection of programs for controlling the network subsystem of the Linux kernel), and install an Apache HTTP Server using the shell provision block.
 lcv1.vm.provision "shell", inline: <<-SHELL
            sudo yum update
            sudo yum install net-tools -y
            yum install -y httpd
          SHELL
    end #End of Centos/7 LON-V001 image config block
I have placed the full version of the code and a link to the GitHub repo below so you can have a full and unbroken view of the code and hopefully understand how it works in full. You can see that the application the code described for LON-V001 is essentially the same for all the other boxes including the Windows ones excluding the vm.provisioner block in the Windows cases.
Vagrant.configure("2") do |config|

    # Linux 1 ->> CentOS User Machine -> LON-CENTOS-V001
    config.vm.define "LON-V001" do |lcv1|
      lcv1.vm.box = "centos/7"
      lcv1.vm.box_check_update = true
      lcv1.vm.hostname = "LON-V001"

      lcv1.vm.network "forwarded_port", guest:XX, host:XXXX
      lcv1.vm.network "private_network", ip: "192.xxx.x.xx", virtualbox__intnet: "labnetwork1"

      lcv1.vm.provider "virtualbox" do |vb|
          vb.memory = "2048"
          vb.gui = true
          vb.name = "LON-V001"
      end

          lcv1.vm.provision "shell", inline: <<-SHELL
            sudo yum update
            sudo yum install net-tools -y
            yum install -y httpd
          SHELL
    end


    # Linux 2 ->> CentOS Web Database Server
    config.vm.define "WebDB01" do |web|
          web.vm.box = "centos/7"
          web.vm.box_check_update = true
      web.vm.hostname = "WebDB01"


          web.vm.network "forwarded_port", guest:XX, host:XXXX
          web.vm.network "private_network", ip: "192.xxx.x.xx", virtualbox__intnet: "labnetwork1"


          web.vm.provider "virtualbox" do |vb|
              vb.memory = "2048"
          vb.gui = false
              vb.name = "WebDB01"
          end

      web.vm.provision "shell", inline: <<-SHELL
        sudo yum update
        sudo yum install net-tools -y
        yum install -y httpd
      SHELL
        end


    # Linux 3 ->> CentOS Web Wordpress Server
        config.vm.define "WebServ01" do |wb|
          wb.vm.box = "centos/7"
          wb.vm.box_check_update = true
      wb.vm.hostname = "WebServ01"

          wb.vm.network "forwarded_port", guest:XX, host:XXXX
          wb.vm.network "private_network", ip: "192.xxx.x.xx", virtualbox__intnet: "labnetwork1"


          wb.vm.provider "virtualbox" do |vb|
              vb.memory = "2048"
              vb.gui = false
              vb.name = "WebServ01"
          end

          wb.vm.provision "shell", inline: <<-SHELL
            sudo yum update
            sudo yum install net-tools -y
            yum install -y httpd
          SHELL
        end


    # Linux 4 ->> Ubuntu Web Wordpress Server
        config.vm.define "LON-V002" do |lcv2|
          lcv2.vm.box = "ubuntu/trusty64"
          lcv2.vm.box_check_update = true
      lcv2.vm.hostname = "LON-V002"

          lcv2.vm.network "forwarded_port", guest:XX, host:XXXX
          lcv2.vm.network "private_network", ip: "192.xxx.x.xx", virtualbox__intnet: "labnetwork1"


          lcv2.vm.provider "virtualbox" do |vb|
              vb.memory = "2048"
              vb.gui = false
              vb.name = "LON-V002"
          end

          lcv2.vm.provision "shell", inline: <<-SHELL
        sudo apt-get update
            sudo apt install net-tools
        sudo apt install apache2
        sudo apt-get install -y git
          SHELL
        end

##########################################################################

    # Windows Server 2022 1 ->> DNS Server (DC)
        config.vm.define "DNS01" do |dns1|
          dns1.vm.box = "gusztavvargadr/windows-server"
      dns1.vm.box_check_update = true
          dns1.vm.hostname = "DNS01"

          dns1.vm.network "forwarded_port", guest:XX, host:XXXX
          dns1.vm.network "private_network", ip: "192.xxx.x.xx", virtualbox__intnet: "labnetwork1"

          dns1.vm.provider "virtualbox" do |vb|
              vb.memory = "2048"
              vb.gui = true
              vb.name = "DNS01"
          end
        end

    # Windows Server 2019 1 ->> Email Server
        config.vm.define "SMTP01" do |smtp1|
          smtp1.vm.box = "StefanScherer/windows_2019"
      smtp1.vm.box_check_update = true
          smtp1.vm.hostname = "SMTP01"
      smtp1.winrm.timeout =   1800 # 30 minutes
      smtp1.vm.boot_timeout = 1800 # 30 minutes
          smtp1.vm.network "forwarded_port", guest:XX, host:XXXX
          smtp1.vm.network "private_network", ip: "192.xxx.x.xx", virtualbox__intnet: "labnetwork1"

          smtp1.vm.provider "virtualbox" do |vb|
              vb.memory = "2048"
              vb.gui = true
              vb.name = "SMTP01"
          end
        end

    # Windows SQL Server 2019 2 ->> SQL Database Server
        config.vm.define "SQL01" do |sql1|
          sql1.vm.box = "gusztavvargadr/sql-server"
      sql1.vm.box_check_update = true
          sql1.vm.hostname = "SQL01"

          sql1.vm.network "forwarded_port", guest:XX, host:XXXX
          sql1.vm.network "private_network", ip: "192.xxx.x.xx", virtualbox__intnet: "labnetwork1"

          sql1.vm.provider "virtualbox" do |vb|
              vb.memory = "2048"
              vb.gui = true
              vb.name = "SQL01"
          end
        end

    # Windows10 1 ->> User Windows VM
        config.vm.define "LON-V003" do |lvc3|
          lvc3.vm.box = "gusztavvargadr/windows-10"
      lvc3.vm.box_check_update = true
          lvc3.vm.hostname = "LON-V003"

          lvc3.vm.network "forwarded_port", guest:XX, host:XXXX
          lvc3.vm.network "private_network", ip: "192.xxx.x.xx", virtualbox__intnet: "labnetwork1"

          lvc3.vm.provider "virtualbox" do |vb|
              vb.memory = "2048"
              vb.gui = true
              vb.name = "LON-V003"
          end
        end

end
Running Vagrant up command:
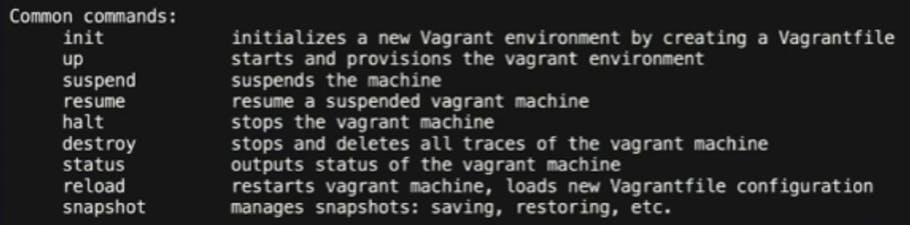
As we can see in the list below, we have common vagrant commands that you would use regularly when dealing with Vagrant projects. We want to run our vagrant configuration.
To do this we need to do run the "vagrant up" command and you'll see the creation of the VMs begin. When this is done, Vagrant downloads the image required to create the VM, it then creates the VM, gives it the instance name you defined and specified and configures any settings such as port forwarding, memory, etc., and wait for it to be ready.

When this is done you should see the VMs appear built and running in the VirtualBox application.
Future Implementations:
In the near future, I aim to merge Vagrant Hostmanager plugin into my Vagrantfile. Vagrant Hostmanager is a Vagrant plugin that manages the host file on guest machines. Primarily used in a multi-machine environment, it provides a solution to the issue within such an environment where the IP addresses are not known in advance. With hostmanager, you essentially set up queries for IP address assignment for the VMs, automatically updating the VM's host file with these changes for you (providing further automation).
I feel that implementing this would greatly reduce the need to edit the Vagrantfile after the initial configuration. Additionally, it would reduce the occurrence of IP conflicts with multiple boxes running at the same time. What should also be mentioned, is that using this plugin completely removes the risk of placing local IP addresses to your code repository, helping adhere to security rules and policies your company may have.
Making use of Vagrant Share plugin to enable sharing of Vagrantfile code. Vagrant Share lets you easily collaborate with others worldwide, sharing your Vagrant environment with just one command, no matter the network setup. This can be done using 1 of 3 modes: HTTP sharing (URL sharing), SSH sharing (command: vagrant connect --ssh), General sharing (command: vagrant connect).
Conclusion:
Implementing Vagrant was an interesting experience, and forced me down a rabbit hole of research which I actually enjoyed. I'm aware many companies use this for internal localized testing but I think ill be looking to set up my Homelab on the cloud permanently next. In saying this, my next project will be utilizing Azure for the Cloud Resume Challenge and further infrastructure projects linked with Terraform and AWS, as well as Docker and Jenkins CI/CD projects due soon as well.
I hope you enjoyed reading through this and gained some insight and understanding into using Vagrant to automate VM creation and management.